
Jewelry 3D Printing: From Design to Casting
3D printing has revolutionized jewelry making, offering unparalleled design freedom and efficiency. This article provides a comprehensive guide to jewelry 3D printing, from initial design to the final casting process. It focuses on the hybrid approach where 3D printing is used to create patterns for traditional investment casting (also known as lost-wax casting), a widely used technique for producing high-quality metal jewelry.
Understanding the Jewelry 3D Printing and Casting Workflow
The process typically involves these key steps:
- Design: Creating a digital 3D model of the jewelry piece using CAD software.
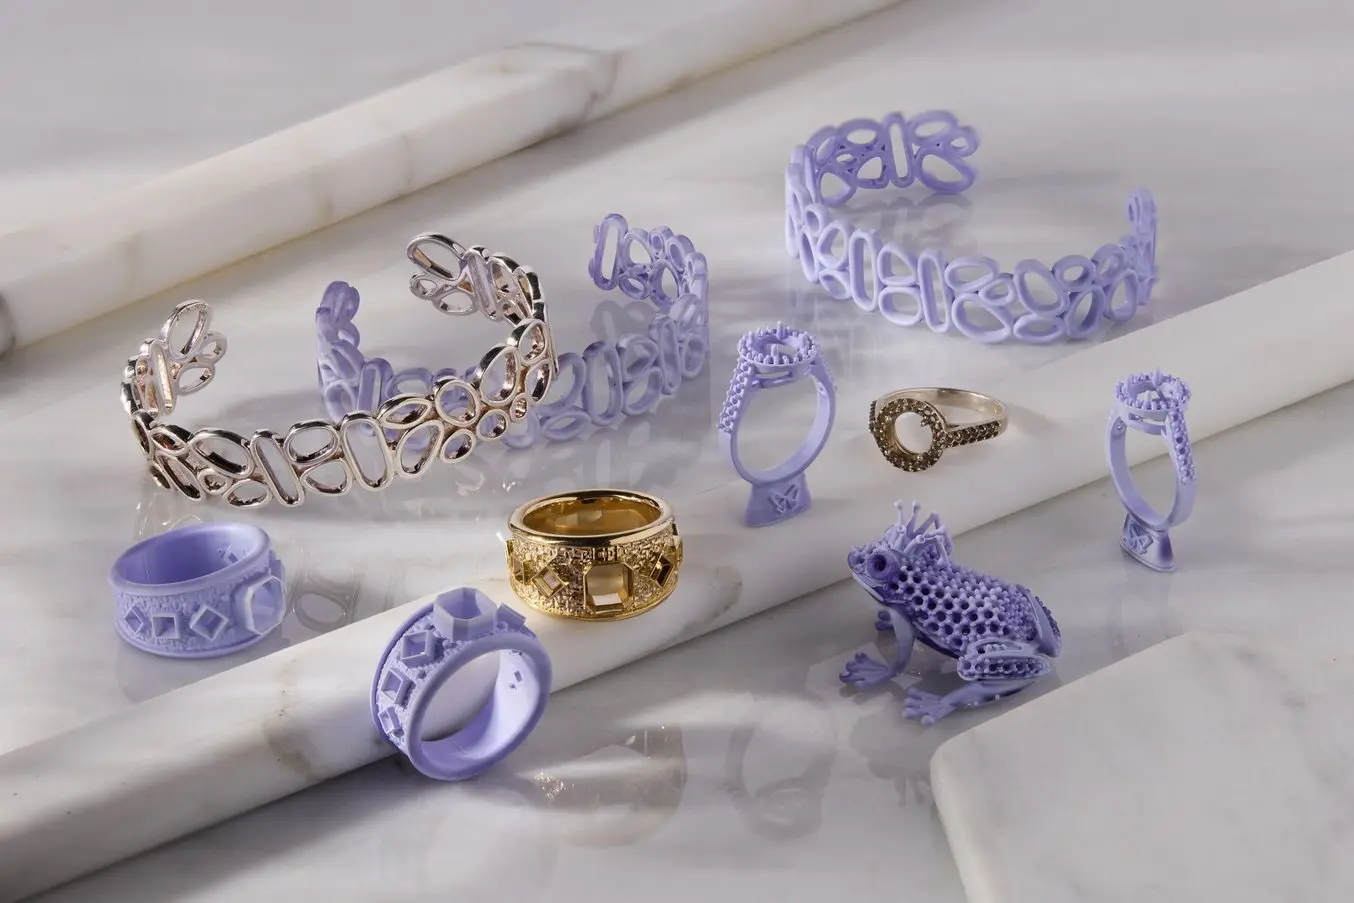
- 3D Printing: Printing the design using a suitable 3D printer and castable material (resin or wax).
- Investment Casting: Creating a mold around the 3D printed pattern, burning out the pattern, and pouring molten metal into the mold.
- Post-Processing: Removing the investment material, cleaning, polishing, and finishing the cast jewelry piece.
Designing for Jewelry 3D Printing and Casting
The design phase is crucial for successful 3D printing and casting. Specialized CAD software like Gemvision Matrix (for which Printie 3D offers Matrix Jewelry Design Training) or RhinoGold is commonly used, although standard CAD programs can also be adapted. Consider the following design guidelines:
- Wall Thickness: Maintain a minimum wall thickness of 0.75mm for small-scale pieces and 0.9mm for larger pieces to ensure structural integrity during printing and casting.
- Hole Diameter: Ensure a minimum through-hole diameter of 0.5mm for proper casting and to prevent blockage.
- Draft Angles: Incorporate a 5-degree draft angle on vertical walls and prongs to facilitate easy removal from the investment mold.
- Internal Corners: Avoid sharp internal corners, as they can create stress points and lead to investment breakage during burnout. Fillet or round these corners.
- Hollowing: For larger designs, consider hollowing the model to reduce material usage and weight. Ensure sufficient venting for proper burnout of the castable material.
- Engraving: Exercise caution with intricate engraving, as it can sometimes be challenging to reproduce accurately in the casting process.
3D Printing Technologies for Jewelry
Several 3D printing technologies are suitable for jewelry making. The most common are:
- SLA (Stereolithography): Uses a laser to cure liquid resin layer by layer. Offers high resolution and excellent surface finish.
- DLP (Digital Light Processing): Projects an image onto the resin, curing an entire layer at once. Faster than SLA.
- LCD (Liquid Crystal Display): Similar to DLP, but uses an LCD screen to mask the light source. More affordable than SLA and DLP, and suitable for jewelry printing.
- Wax Jetting: This technology directly prints with wax, creating highly accurate patterns that require no burnout cycle adjustments. Printie 3D offers the WaxJet 3D Printer.
Resin 3D Printing, especially SLA, DLP, and LCD, is popular due to the fine detail achievable. Consider Printie 3D's Resin 3D Printing services for high-resolution models.
Materials for Jewelry 3D Printing
The choice of material depends on the 3D printing technology and the desired casting outcome. Common materials include:

- Castable Resins: Specifically formulated resins designed to burn out cleanly during the investment casting process. These resins often contain a percentage of wax to improve burnout. Some resins, like Castable High Wax Resin, contain around 30% wax content.
- Wax Filaments: Used primarily with FDM (Fused Deposition Modeling) printers. Direct wax printing can simplify the casting process but may require specialized equipment.
- Standard Resins: Used for prototyping and test fitting before committing to castable materials. Standard resins are more affordable than castable resins.
The Investment Casting Process
Investment casting, also known as lost-wax casting, is a well-established process. Here's a breakdown:
- Investing: The 3D printed pattern is attached to a sprue system (a network of channels for the molten metal to flow through). The pattern and sprue are then encased in an investment material (a ceramic slurry). Pour the investment material slowly and vibrate to remove air bubbles.
- Burnout: The investment mold is heated in a kiln to burn out the 3D printed pattern, leaving a hollow cavity in the shape of the jewelry piece. A critical step is to follow the recommended burnout schedule for the specific resin or wax used. This typically involves a slow temperature ramp to ensure complete removal of the material without cracking the mold.
- Melting and Pouring: The desired metal is melted and poured into the heated investment mold.
- Quenching: Once the metal has cooled, the mold is quenched in water to dissolve the investment material.
Post-Processing and Finishing
After casting, the jewelry piece requires post-processing:

- Mold Removal: Remove the remaining investment material from the cast piece.
- Sprue Removal: Cut off the sprue system.
- Cleaning: Clean the piece to remove any residue.
- Polishing: Polish the piece to achieve the desired surface finish.
- Finishing: Apply any necessary finishing touches, such as setting gemstones or applying a protective coating.
Benefits of 3D Printing for Jewelry
3D printing offers numerous advantages over traditional jewelry making methods:
- Design Freedom: Create complex and intricate designs that would be difficult or impossible to achieve manually.
- Rapid Prototyping: Quickly iterate on designs and create prototypes for testing and refinement.
- Mass Customization: Easily produce customized jewelry pieces tailored to individual customer preferences.
- Reduced Lead Times: Significantly reduce the time required to produce jewelry pieces compared to traditional methods.
- Reduced Material Waste: Minimize material waste by printing only the required amount of material.
- Scalability: Easily scale production to meet demand.
Limitations and Challenges
While 3D printing offers many benefits, there are also limitations to consider:
- Material Costs: Castable resins and waxes can be more expensive than traditional materials.
- Equipment Costs: High-quality 3D printers can be a significant investment.
- Casting Defects: Issues such as porosity, incomplete fills, and surface imperfections can occur during the casting process. Careful design, material selection, and process control are essential to minimize these defects.
- Burnout Challenges: Improper burnout can lead to residue in the mold, affecting the quality of the casting.
Key Considerations and Practical Tips
- Layer Height: For intricate details, use a smaller layer height. Gildform recommends 25 microns for fine details.
- Support Structures: Properly design support structures to ensure successful printing, but minimize their contact points to ease removal.
- Post-Curing: Some castable resins benefit from post-curing to improve their mechanical properties and burnout characteristics.
- Burnout Schedule: Adhere strictly to the recommended burnout schedule for the specific resin or wax being used.
Printie 3D offers a range of 3D printing services for jewelry, including design assistance and material selection guidance. Contact Us for a consultation.