Introduction to Post-Processing
Post-processing refers to the range of techniques applied to a 3D printed object after it has been removed from the printer. These techniques are crucial for enhancing the final product's appearance, improving surface finish, reinforcing mechanical properties, increasing dimensional accuracy, and, in some cases, supporting standards compliance. A well-executed post-processing workflow can significantly extend the lifespan and usability of a 3D printed part. Post-processing techniques can be broadly categorized into three main types: subtractive, additive, and property-changing.
- Subtractive Techniques: Remove material to refine the surface or shape.
- Additive Techniques: Add material to improve surface finish, color, or functionality.
- Property Changing Techniques: Alter the material's inherent properties through processes like heat treatment.
Material-Specific Techniques
The selection of appropriate post-processing techniques depends heavily on the material used in the 3D printing process and the specific printing technology employed. Different materials require different approaches to achieve optimal results. Here's a breakdown by material type and printing technology:
Polymers (FDM, SLA/DLP, SLS)
Polymers are widely used in 3D printing due to their versatility and ease of processing. Common post-processing techniques include:
- FDM (Fused Deposition Modeling): Sanding, filling, priming, painting, chemical smoothing (for ABS), and annealing (for PLA).
- SLA/DLP (Stereolithography/Digital Light Processing): Washing (to remove uncured resin), post-curing (to fully harden the resin), sanding, polishing, and painting.
- SLS (Selective Laser Sintering): Dyeing, sanding, and coating.
Metals (PBF, DED, Binder Jetting, Metal Extrusion)
Metal 3D printing is used for producing high-strength, functional parts. Post-processing is essential to achieve desired mechanical properties and surface finish:
- PBF (Powder Bed Fusion): Heat treatment (annealing, stress relieving), Hot Isostatic Pressing (HIP), machining, and polishing.
- DED (Directed Energy Deposition): Machining, grinding, and heat treatment.
- Binder Jetting: Curing, debinding (removal of binder material), sintering, and infiltration.
- Metal Extrusion: Sintering, machining, and polishing.
Composites
Composite materials offer a combination of strength and lightweight properties. Post-processing typically involves:
- Sanding, coating, and machining. Specific techniques depend on the matrix material (polymer or metal).
Subtractive Techniques: Material Removal
Subtractive techniques remove material to refine the surface or shape of the 3D printed part.
Sanding and Polishing
Sanding is a fundamental technique for smoothing rough surfaces. It involves using progressively finer grit sandpaper, typically starting with a coarser grit (e.g., P100-P220) to remove larger imperfections and moving to finer grits (e.g., P400-P600, P800-P1200, P2000-P3000, even up to P12000) for a smooth finish. Wet sanding, using water as a lubricant, can further enhance the smoothness. Polishing follows sanding, using polishing compounds and tools to achieve a glossy or reflective surface. Use mineral oil after washing for a super smooth surface finish.
Tumbling
Tumbling involves placing 3D printed parts in a rotating drum with abrasive media. This process is effective for deburring, smoothing edges, and achieving a uniform surface finish on multiple parts simultaneously.
Abrasive Blasting (Media Blasting)
Abrasive blasting uses compressed air to propel abrasive media (e.g., sand, glass beads, plastic beads) against the surface of the part. This technique is useful for removing support structures, cleaning surfaces, and creating a matte finish.
CNC Machining (Milling)
CNC machining can be used to achieve high dimensional accuracy and precise surface finishes on 3D printed parts. This technique is particularly useful for metal parts where tight tolerances are required. Milling can remove entire layers of material, or just a few fractions of a millimeter.
Chemical Smoothing/Dipping
Chemical smoothing involves exposing the 3D printed part to a solvent vapor or liquid that partially dissolves the surface, resulting in a smoother finish. Acetone vapor smoothing is commonly used for ABS. This process requires proper ventilation and safety precautions. Test on non-critical parts first due to potential shrinkage.
Additive Techniques: Material Addition
Additive techniques involve adding material to the 3D printed part to improve surface finish, color, or functionality.
Filling
Filling is used to repair imperfections, such as gaps or voids, in the 3D printed part. Epoxy resins or specialized fillers can be used. The filler is applied, allowed to cure, and then sanded to blend seamlessly with the surrounding surface.
Priming
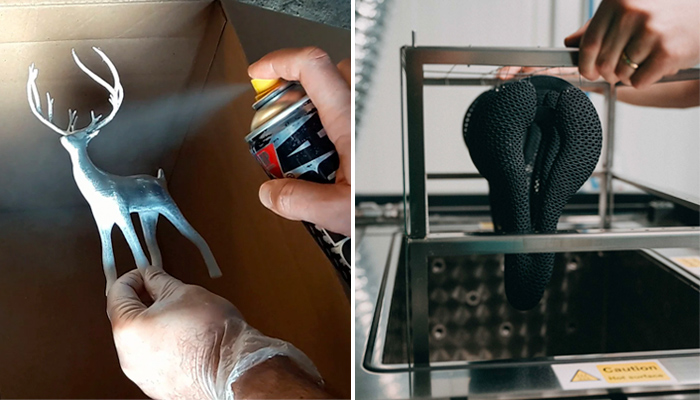
Priming involves applying a primer coat to the surface of the 3D printed part. Primer improves paint adhesion and helps to fill minor imperfections, creating a smoother surface for painting. Use multiple thin coats of spray paint for best results.
Brush Coating, Spray Coating, Dip Coating
These techniques involve applying a liquid coating to the surface of the 3D printed part. Brush coating is suitable for small areas or intricate details. Spray coating provides a more uniform finish over larger surfaces. Dip coating involves immersing the part in a liquid coating material. Use 2K resin for robust and smooth surfaces. Spray from a distance of approx. 20cm (8-10in.) at an angle of about 15°.
Metal Plating
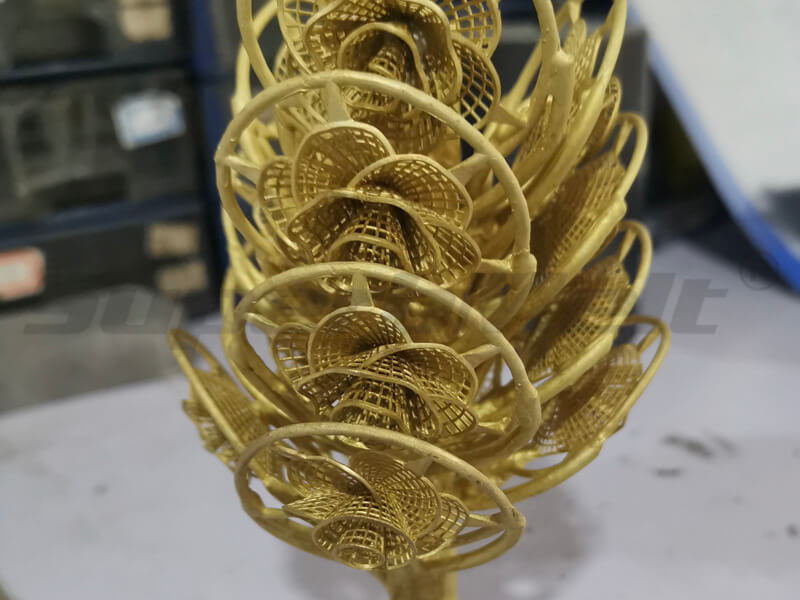
Metal plating involves depositing a thin layer of metal onto the surface of the 3D printed part. This can improve the part's appearance, conductivity, or wear resistance. Electroless plating is the first step, using copper or nickel, followed by electroplating in a galvanic bath (1-50 microns thick). 3D printing for jewelry often uses this technique.
Property Changing Techniques: Material Alteration
Property changing techniques alter the material's inherent properties, enhancing strength, durability, or other characteristics.
Annealing (for Polymers)
Annealing involves heating the 3D printed part to a specific temperature below its melting point and holding it at that temperature for a certain period. This process can relieve internal stresses and improve the part's mechanical properties. For PLA, temperatures up to 110°C can improve mechanical properties by 4.88% to 10.26%.
Heat Treatment and Hot Isostatic Pressing (HIP) for Metals
Heat treatment involves heating metal parts to specific temperatures to alter their microstructure and mechanical properties. Hot Isostatic Pressing (HIP) involves applying high temperature and pressure in an inert gas environment to eliminate internal voids and improve density.
Coloring and Finishing
Coloring and finishing techniques add color and protect the surface of the 3D printed part.
Dyeing
Dyeing involves submerging the 3D printed part in a heated dye solution. The dye penetrates the surface, imparting color. The time required depends on the desired color intensity. Use separate wash solutions for dyed parts to avoid cross-contamination.
Painting (Acrylic, Spray)
Painting involves applying paint to the surface of the 3D printed part. Acrylic paints are versatile and easy to use. Spray paints provide a more uniform finish. Apply primer to fill imperfections and improve paint adhesion.
Safety Considerations
Many post-processing techniques involve the use of chemicals, powders, and equipment that can pose safety hazards. It is essential to wear appropriate personal protective equipment (PPE), such as gloves, respirators, and eye protection. Ensure proper ventilation when working with chemicals. Always follow manufacturer's instructions and safety guidelines.
Cost and Time Estimates
The cost and time required for post-processing vary depending on the technique, material, and part complexity. Some techniques, such as sanding and painting, are relatively inexpensive and time-consuming. Other techniques, such as CNC machining and metal plating, can be more expensive and require specialized equipment. Consider the trade-offs between cost, time, and desired finish when selecting post-processing techniques. Printie 3D offers transparent pricing for various services.