
Introduction to Dental 3D Printing
3D printing has revolutionized the dental industry, offering significant advantages over traditional methods. These benefits include increased speed, enhanced precision, greater customization, and reduced costs for certain applications. From models and aligners to surgical guides and dentures, 3D printing is transforming how dental professionals design, manufacture, and deliver patient care. Printie 3D has been at the forefront of this technology in Jordan since 2012, offering comprehensive 3D printing services to the dental community.
Overview of 3D Printing Technologies for Dentistry
Several 3D printing technologies are used in dentistry, each with its strengths and weaknesses. The most common technologies include:
- Digital Light Processing (DLP): DLP printers use a projector to cure resin layer by layer. They offer high speed and accuracy, making them suitable for various dental applications.
- Liquid Crystal Display (LCD): Similar to DLP, LCD printers use an LCD screen to mask the light source, curing the resin. They are typically more affordable than DLP printers.
- Stereolithography (SLA): SLA printers use a laser to selectively cure resin. They are known for producing parts with exceptional surface finish and accuracy.
The choice of technology depends on the specific application, budget, and desired level of precision. For example, the Prodways MOVINGLight DLP technology offers 42 µm resolution (600 DPI), ideal for high-precision applications. Learn more about our range of 3D printers and equipment.
Dental 3D Printing Workflow: A Step-by-Step Guide
The dental 3D printing workflow involves several key stages, from initial data acquisition to final delivery.
1. Data Acquisition
The first step is to acquire a digital representation of the patient's oral anatomy. This can be achieved through:
- Intraoral Scanning (IOS): IOS devices directly scan the patient's mouth, creating a digital model. High-resolution IOS with a minimum of 50-micron accuracy is recommended for applications like aligner production.
- Model Scanning: Traditional impressions are poured into stone models, which are then scanned using a desktop scanner.
Proper scanning protocols and data validation are crucial to ensure the accuracy of the digital model.
2. Design (CAD/CAM)
Using CAD/CAM software, the digital model is used to design the desired dental appliance (e.g., aligner, crown, surgical guide). This stage involves treatment planning and precise design considerations.
3. Print Preparation
Before printing, the 3D model needs to be prepared using specialized software. This includes:
- Model Repair: Fixing any errors or imperfections in the digital model.
- Orientation: Optimizing the part's orientation on the build platform to minimize support structures and improve print quality.
- Support Generation: Adding support structures to ensure the part is properly supported during printing.
- Nesting: Arranging multiple parts on the build platform to maximize printing efficiency.
- Slicing: Converting the 3D model into a series of 2D layers that the printer can understand. Typical layer thickness is 25-50 microns.
4. Printing
This stage involves selecting the appropriate 3D printer, calibrating the printer, choosing the right material, and initiating the printing process. Consider the printer's build volume; for example, the iLux Pro Dental Printer has a build volume of 192 x 108 x 200 mm and an XY resolution of 50-micron pixel pitch.
5. Post-Processing
After printing, the part needs to be post-processed to achieve the desired properties and appearance. This includes:
- Washing: Removing uncured resin from the part using isopropyl alcohol (IPA). Use ultrasonic vibration (~40 kHz) and gentle heating (~50°C) for 8 minutes, followed by a second wash cycle for another 8 minutes.
- Curing: Exposing the part to UV light to fully cure the resin and optimize its mechanical properties and biocompatibility. UV curing at 405-385 nm with intensity >2000 mW/cm² for 10 minutes per side (20 minutes total), with a heating element at 60°C is recommended.
- Support Removal: Carefully removing the support structures from the part.
- Finishing: Polishing or otherwise refining the surface of the part.
6. Delivery
The final stage involves quality control, ensuring the appliance meets the required specifications, and patient education.
Material Selection for Dental 3D Printing
A wide range of dental resins are available for 3D printing, each with specific properties and applications. These include resins for:
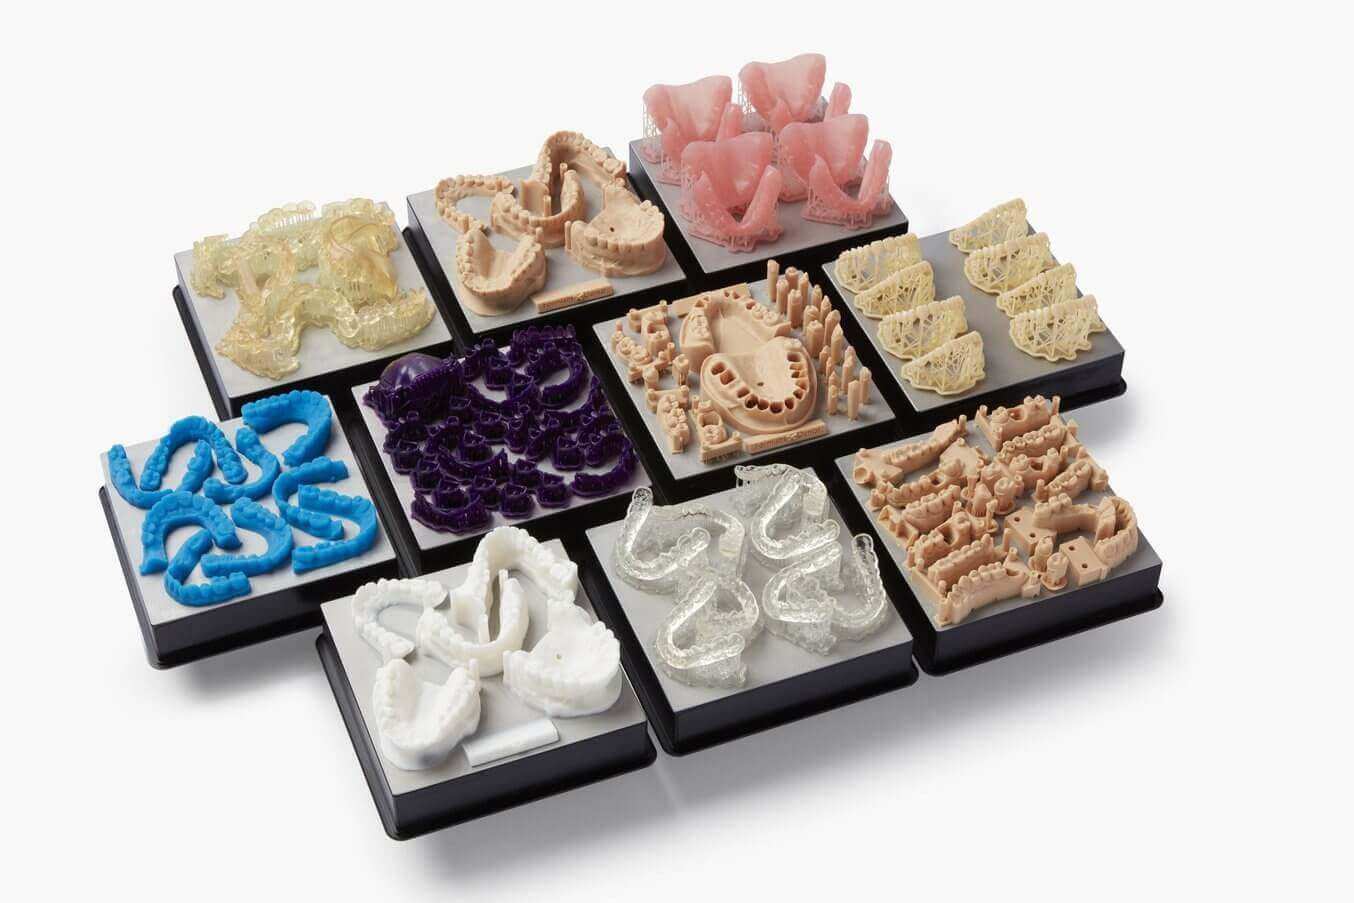
- Study Models
- Surgical Guides
- Dental Aligners
- Dentures
- Crowns and Bridges
Dental resins generally cost between €50 and €150 per liter. It's essential to select a material with the appropriate flexural strength, hardness, biocompatibility, and other properties for the intended application. Always consult the manufacturer's instructions for use (IFU) when using biocompatible resins for clinical applications.
Equipment Selection
Choosing the right equipment is crucial for a successful dental 3D printing workflow. Consider:
- 3D Printer: Select a printer with the appropriate technology, build volume, resolution, and material compatibility.
- Washing Unit: A dedicated washing unit ensures thorough removal of uncured resin.
- Curing Unit: A curing unit with controlled temperature and UV intensity is essential for optimal curing.
- Software: Choose CAD/CAM and print preparation software that is compatible with your printer and workflow.
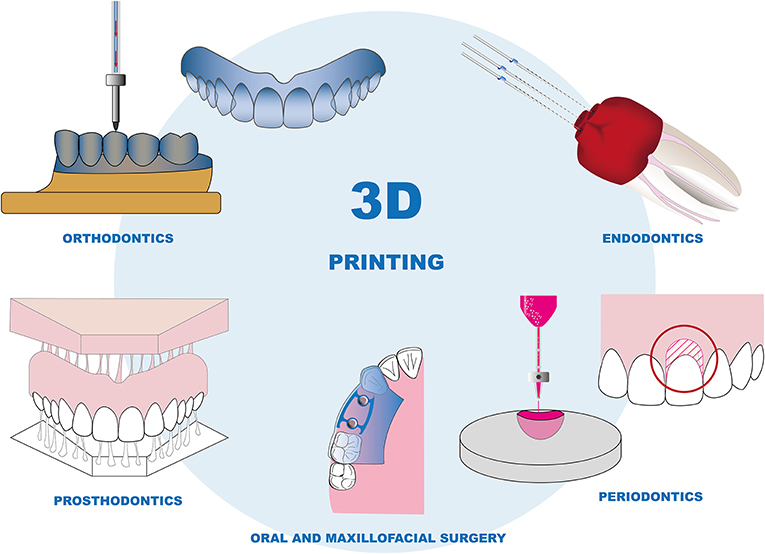
Specific Applications
3D printing is used for a variety of dental applications, including:

- Clear Aligners: Digital polishing during printing delivers higher clarity, potentially eliminating the need for manual polishing. Soak DCA resin aligners in 60°C (140°F) hot water for 2-3 minutes to activate shape memory.
- Surgical Guides: Provides accurate placement of implants.
- Dentures: Allowing for faster and more customizable denture production.
Troubleshooting Common Issues
Common issues in dental 3D printing include:
- Printing Failures: Often caused by improper build platform leveling, insufficient support structures, or incorrect material settings.
- Material Problems: Can result from using expired resin, improper storage, or incompatible materials.
- Dimensional Inaccuracy: May be due to calibration issues, incorrect slicing parameters, or warping during printing.
Ensuring proper build platform leveling and resin temperature before printing is crucial. Thorough washing is also essential to prevent issues with the final product.
Cost Analysis
The cost of dental 3D printing depends on several factors, including:
- Printer Cost: The initial investment in a 3D printer can range from a few thousand to tens of thousands of dollars.
- Resin Cost: Dental resins vary in price depending on their properties and application.
- Labor Cost: The time required for design, print preparation, post-processing, and quality control contributes to the overall cost.
Contact Printie 3D for a consultation and personalized cost analysis for your specific dental 3D printing needs.